Utilizing Fiddler to collect captures for troubleshooting
In some situations, our Support team will ask you to gather a Fiddler to capture in order to troubleshoot a network-related issue. Here’s a step-by-step guide that will guide you through this procedure.
First, you will want to download Fiddler from the official website: https://www.telerik.com/download/fiddler
Once the download is complete, please install Fiddler by following the simple installation wizard steps.
Backup Agent pre-settings
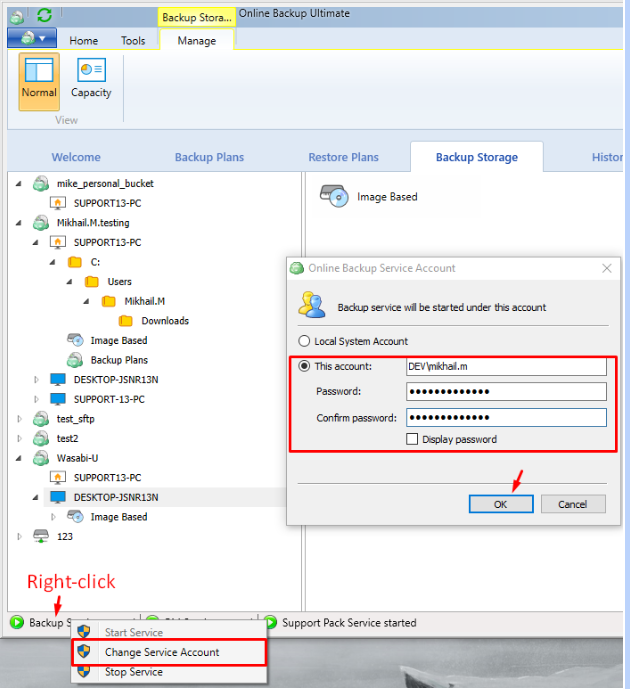
Before opening the Fiddler application, please change the Service Account to the one that you used to sign in to Windows:
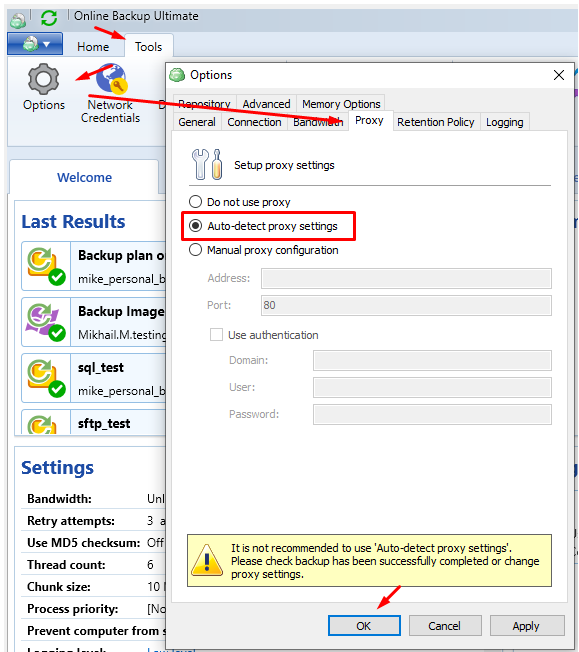
And change the Proxy setting in your Backup Agent to Auto-detect proxy settings:
Fiddler settings
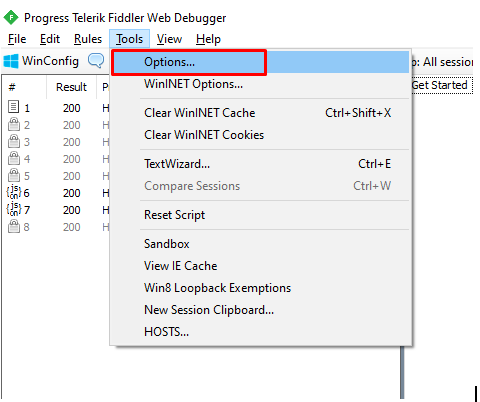
Open Fiddler and click Cancel if there is a prompting message. Proceed to Tools - Options:
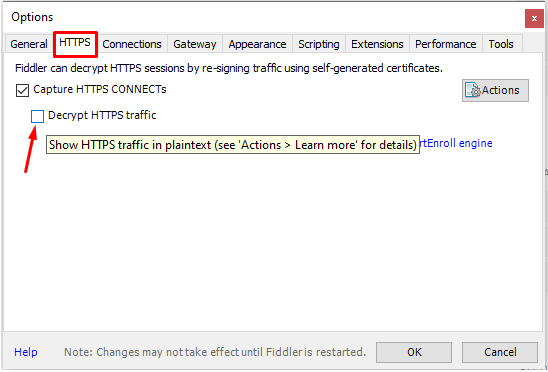
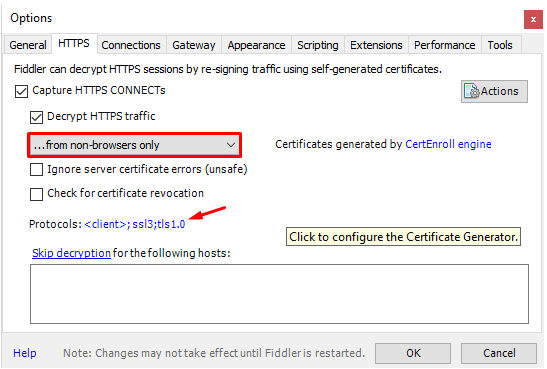
Open HTTPS tab and check Decrypt HTTPS traffic option:
Click Yes every time you are prompted
After that, select "...from non-browsers only" and click on <client>;ssl3;tls1.0 next to the Protocols:
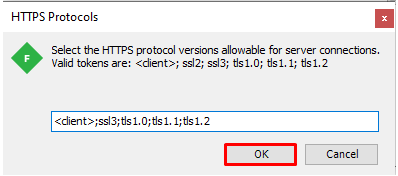
Please add tls1.1;tls1.2 to the end of the line. It should end up looking like this. Click OK and then click OK again to save these settings:
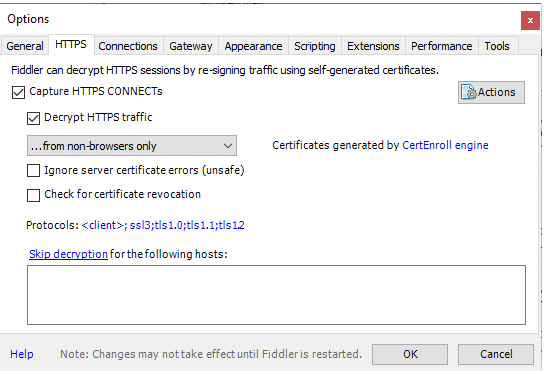
Check that these protocols were added to the line:
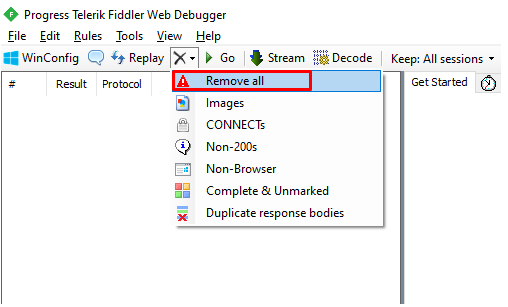
Click on the black X mark to empty the capture list:
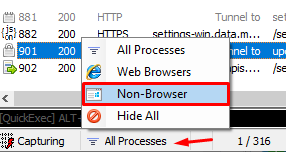
In addition to that, please change the filter to non-browser in the left lower corner:
Trust Fiddler certificate
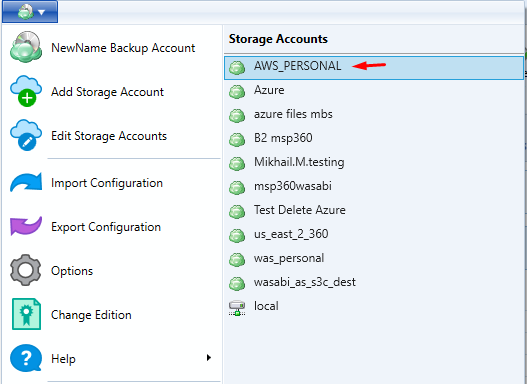
In the Backup Agent, open main menu and choose the affected Storage Account:
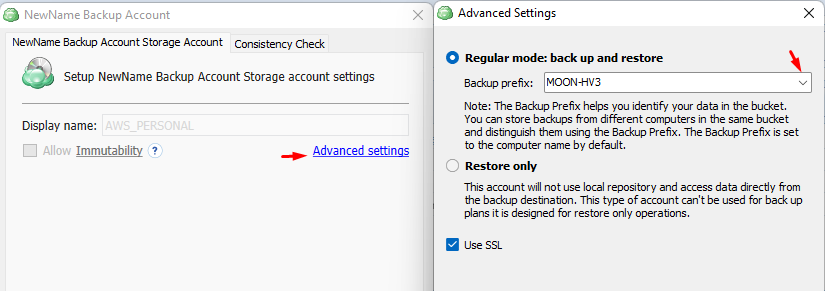
Click on Advanced Settings and open the Backup prefix drop-down:
Click Yes/Allow for all certificate pop-ups
Saving Captured sessions
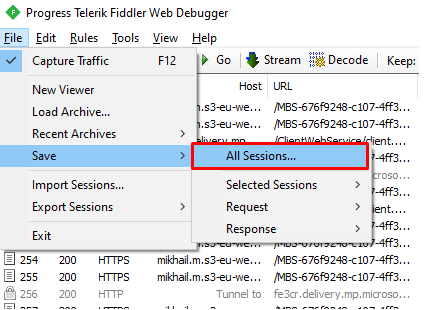
With Fiddler running, please restart your backup plan. Once the backup plan has run its course, if it is still presenting you with errors or warnings, please go to Fiddler - File - Save - All Sessions:
Select a location to save the Capture Archive and send us the generated .saz file as an attachment (or upload it to a resource of your choosing and send us the download link).