How to import your image to AWS EC2 manually
Use case
Sometimes, due to different limitations it might be necessary to know how to use VM import image option for restoring/migrating your server to AWS EC2 manually.
Before you begin
As usual, prior to start the process you have to follow the list of prerequisites and make sure that your image is compatible and ready for importing.
To make sure that your system is in the list of supported, you can follow the AWS Documentation and find if it's on it. Besides that, you can check what formats can be used for initiating the import process.
Below we will describe an example of importing VHD file exported from Hyper-V. In fact this VHD file was restored by using an Image-Based Backup done by CloudBerry Lab.
The OS that was aimed for export is Windows Server 2008 Standard, 64-bit
Steps to perform
- Upload your VHD (VHDX, OVA, VMDK, ) to AWS S3 bucket. Better to use the bucket in the same region where you are going to spin up your EC2 instance. 2.The uploading process will take some time so meanwhile we can do other things.
- Install AWS CLI on your device: Install the AWS CLI on Windows Install the AWS CLI on Linux Install the AWS CLI on macOS
- Configure it by issuing a command aws configure You'll be prompted to enter your security credentials (Access Key ID, Secret Access Key), default region and default output format. Replace all fields with yours
Example:
$ aws configure
AWS Access Key ID [None]: AKIAIOSFODNN7EXAMPLE
AWS Secret Access Key [None]: wJalrXUtnFEMI/K7MDENG/bPxRfiCYEXAMPLEKEY
Default region name [None]: us-west-2
Default output format [None]: json
- Prepare the JSON document that will be needed later. This document should contain the information about the disk format, the bucket where the virtual disk is located and the folder (prefix) where this disk was uploaded. Name the file as containers.json and save it somewhere on your computer. For easier usage, better to save it in the same directory where you have your AWS CLI/bin cause you'll be running commands from here.
containers.json file example (replace all fields with yours)
[
  {
    "Description": "Windows 2008 VHD",
    "Format": "vhd",
    "UserBucket": {
        "S3Bucket": "my-import-bucket",
        "S3Key": "vms/my-windows-2008-vm.vhd"
    }
}]
- Once the virtual disk is uploaded to the bucket and JSON file is created, you can start the import job.
- Run the command (by filling all needed fields with yours)
aws ec2 import-image --description "Windows 2008 VHD" --license-type <value> --disk-containers "file://containers.json"
Available licensing options:
Auto (default) Detects the source-system operating system (OS) and applies the appropriate license to the migrated virtual machine (VM). AWS Replaces the source-system license with an AWS license, if appropriate, on the migrated VM. BYOL Retains the source-system license, if appropriate, on the migrated VM.
Once you started the import, you'll receive an output with the status and import task ID.
For thecking the status you need to issue another command (replace task ID with your):
aws ec2 describe-import-image-tasks --import-task-ids import-ami-050c284124612f49d
- There are different statuses (from the biginning to the end): converting -> booting.
- You need to receive an output with the status "completed" and with the snapshot ID.
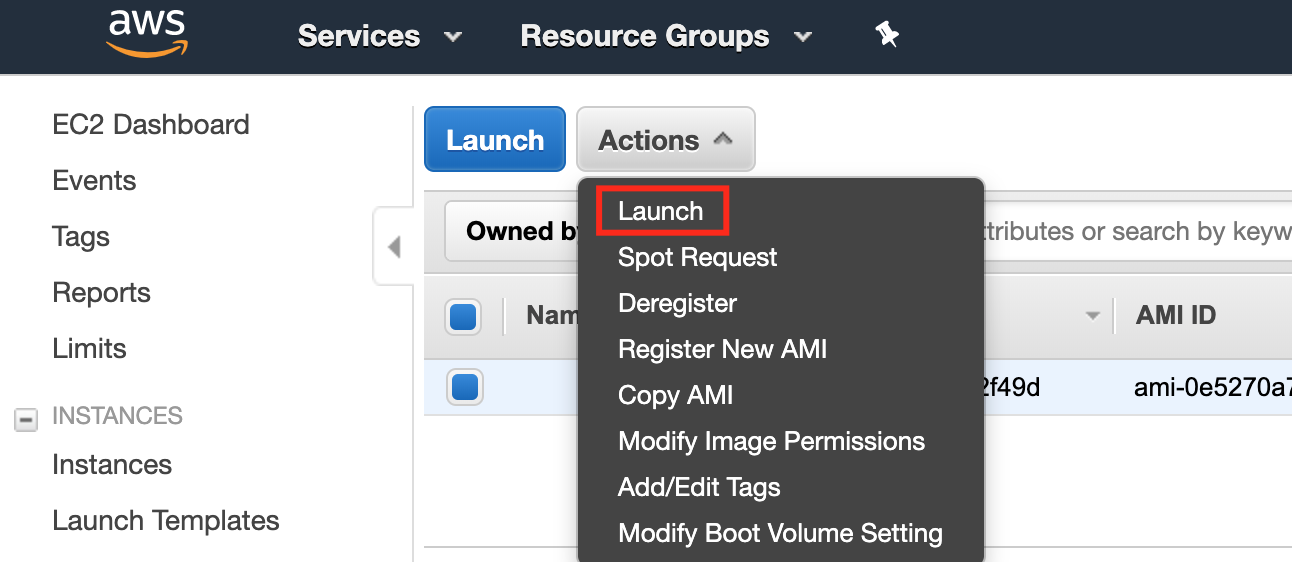
- Once you get it, you can go to the AWS console, find the AMI there and launch an instance from it.

For more commands you can refer to the AWS VM Import/Export User Guide
Tech questions: tech@cloudberrylab.com
Sales questions: sales@cloudberrylab.com

