Configuring AWS Storage Gateway For Backup
In some cases, it might be useful to use AWS storage gateway service provided by Amazon. It allows having frequently used data on premises while having the rest in the cloud. With configured storage gateway service, you will be able to see all your data on your mapped drive. You can easily access data using explorer and download separate files.
For more information about Storage Gateway service please follow to the AWS documentation.
This article describes configuration of Storage Gateway hosted on Microsoft Hyper-V.
Prerequisites
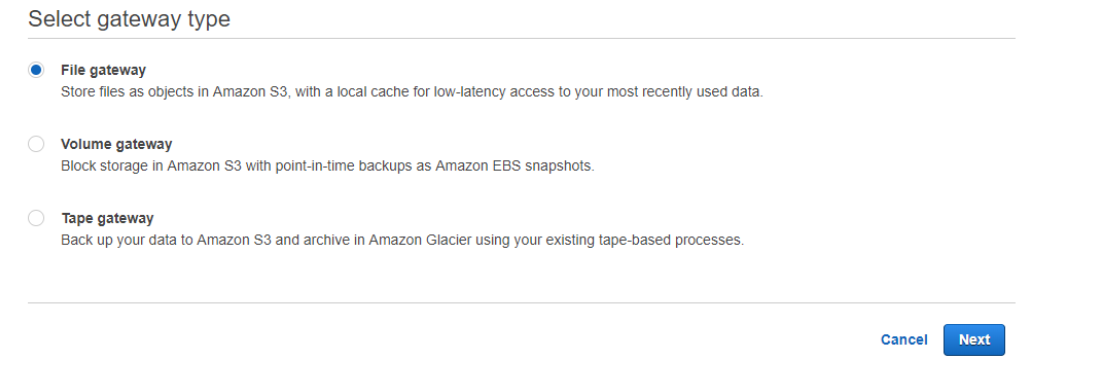
Navigate to AWS Console and find AWS Storage Gateway in Storage field.

For file level backup select File Gateway.
For more information about File Gateway type, please visit: AWS official website
Download the image of the virtual machine to start configuring the gateway according to your host platform.
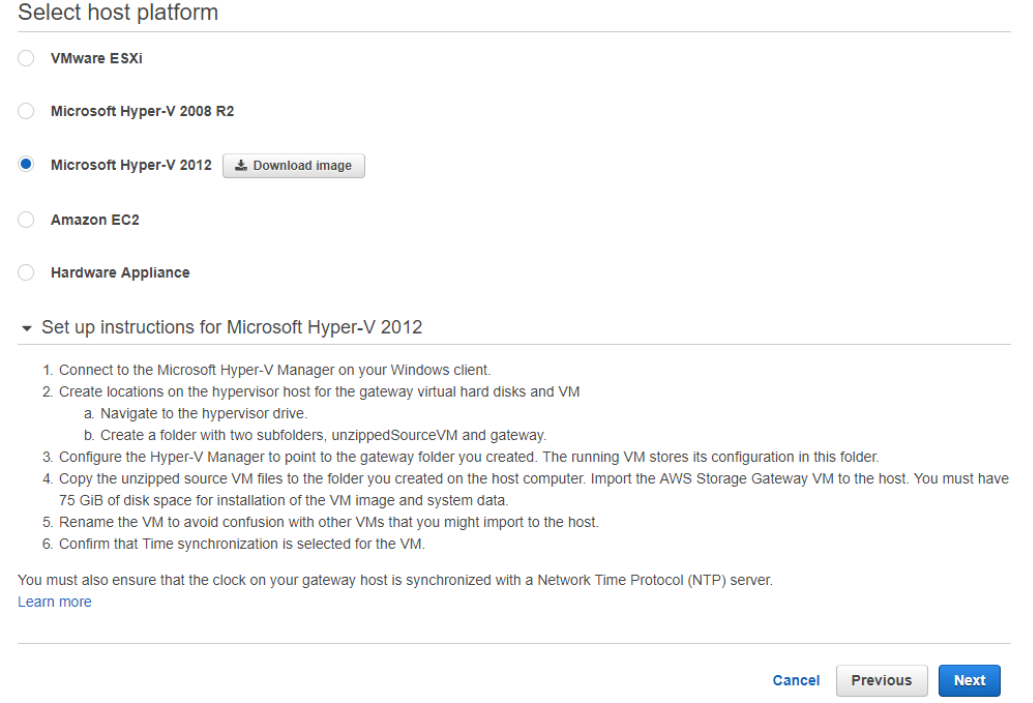
Unzip downloaded file.
Configure Host Platform
Create a new virtual machine.

Select Generation 1, assign at least 4 GB of RAM, select preconfigured virtual network switch which is connected to the internet.
Select Use an existing virtual hard disk and find downloaded VHD file.
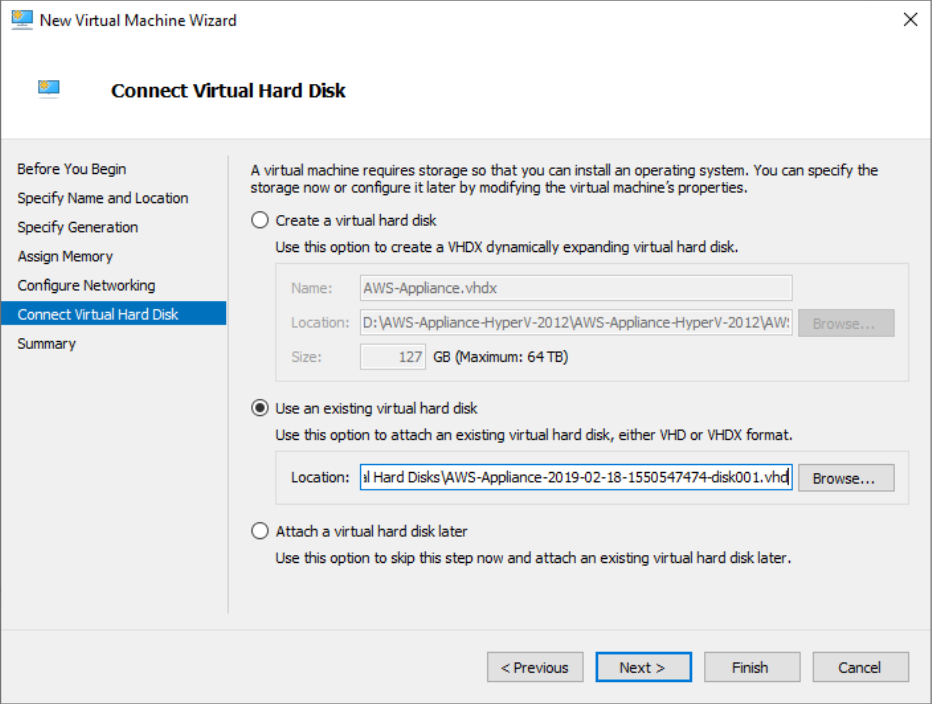
Do not start this virtual machine. Some options need to be configured before starting.
Open settings for this machine.
Add an additional IDE drive. Allocate at least 50 GB, it can be in dynamic mode.
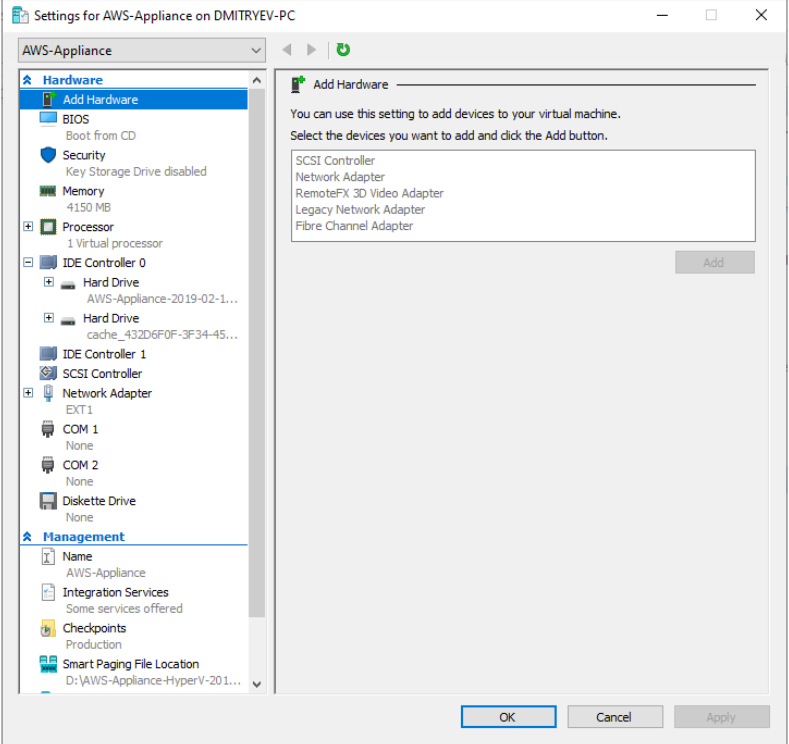
Start this VM.
To enter VM use username - admin and password is password.
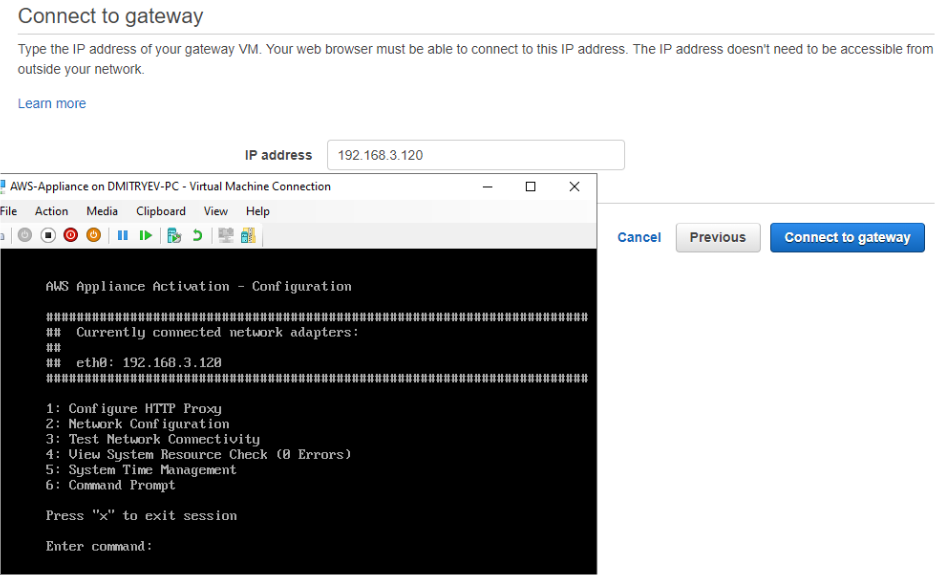
On the next step, you will see your IP address assigned by DHCP server. You can assign the static IP in the corresponding menu. You can also check your network connectivity to ensure a stable connection. Another useful option is syncing your time.
Configuring the AWS Storage Gateway
In case if everything is ok, return to the AWS console and continue configuring your gateway.
Put the IP address from the virtual machine to the IP address field.
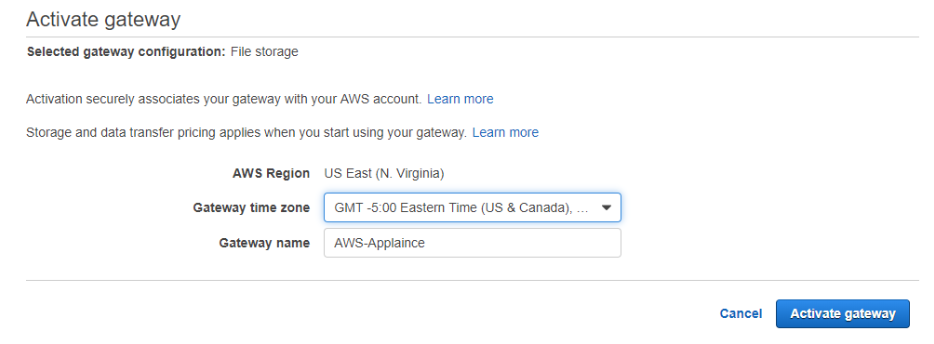
Specify your gateway time zone. Give the name to your Gateway.
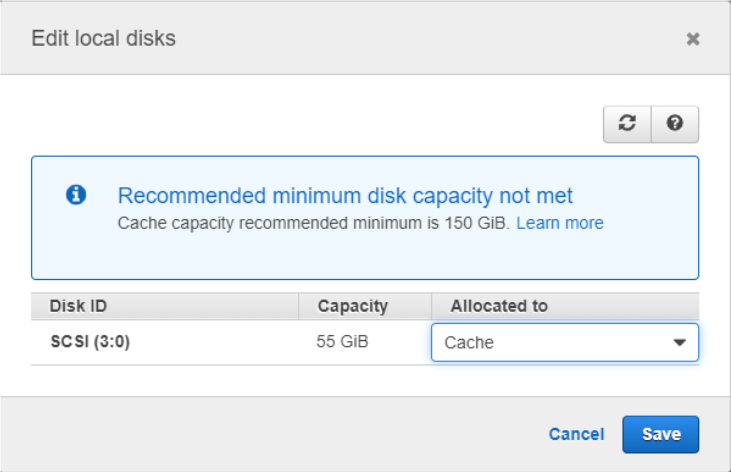
Configure local disks. Just select the disk you created before.
It’s possible that your machine will be unreachable for AWS after it starts. In this case please wait several minutes. You will have the opportunity to configure local disks later if it fails to load VM’s disks.
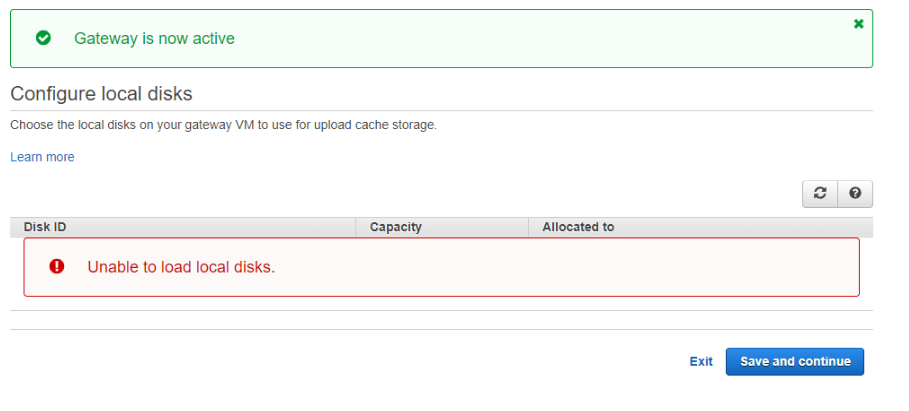
Here you can press Save and continue. In most cases, VM starts working properly after reboot.
If you see the status of Storage Gateway is running, click on Edit local disks button.
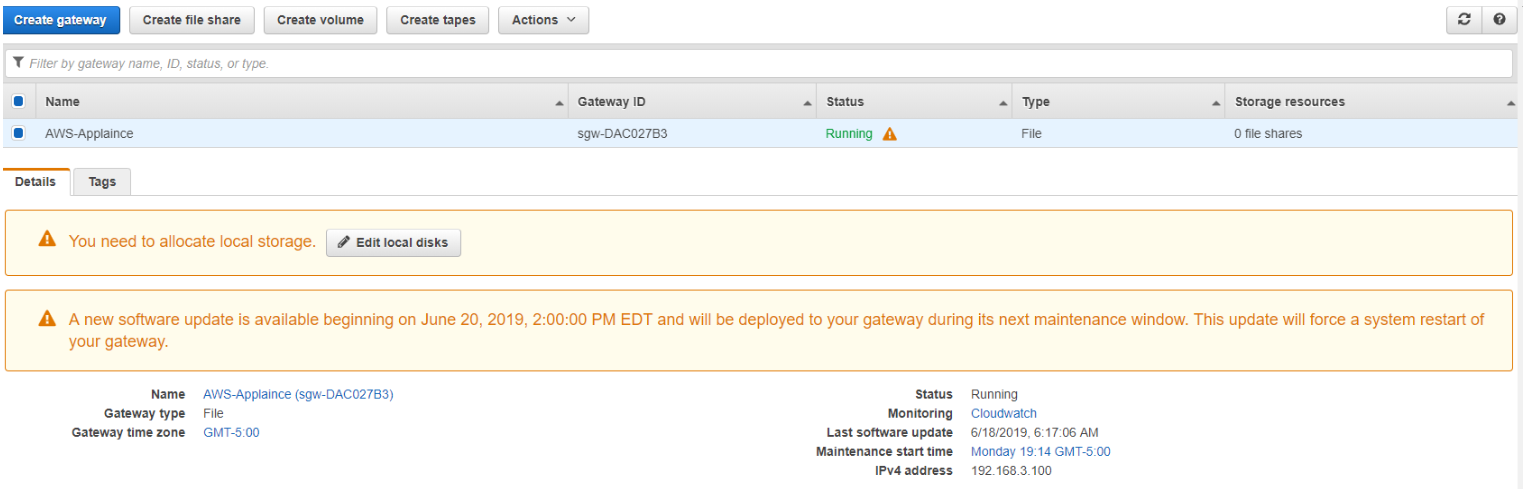
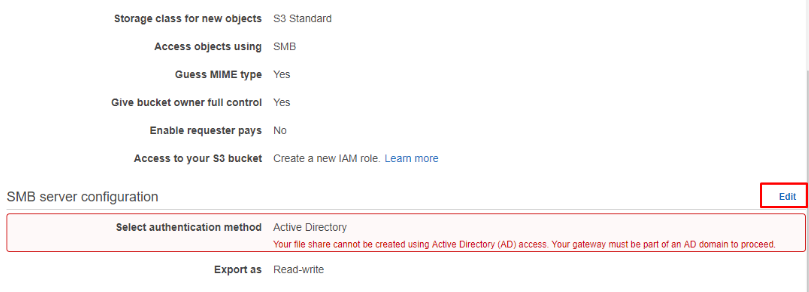
On next step, you can configure your local storage.

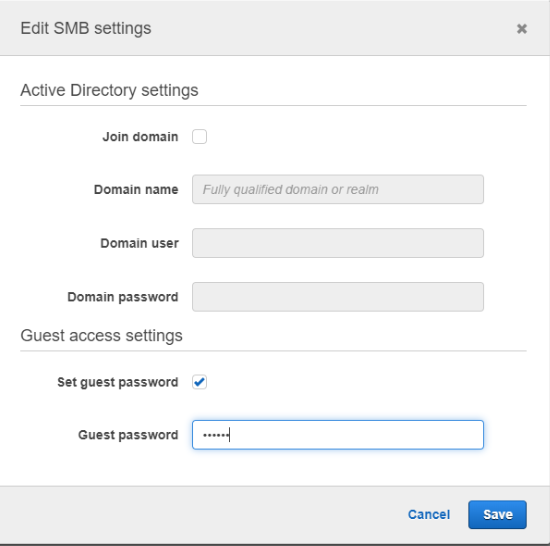
- In case you would like to create the SMB share, you should configure additional settings before creating that share. Check the Set guest password box and create a guest password. This password will be used as network access credentials.
- Create a file share.
File share connects your bucket with your on-premises environment. This drive will be mapped as SMB or NFS drive. In other words, you will have your bucket mapped as SMB or NFS drive.

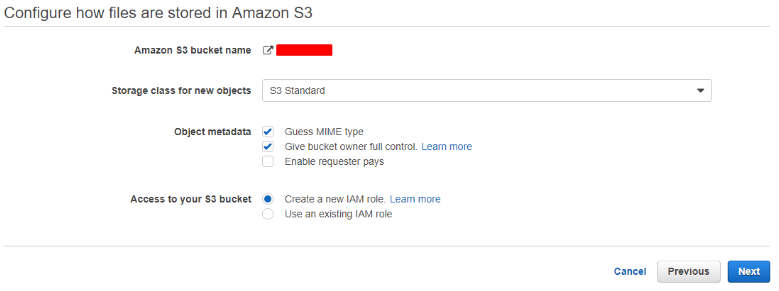
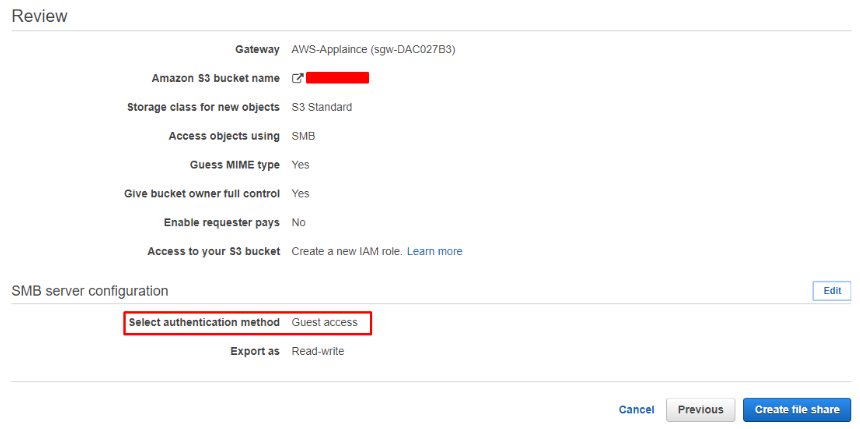
Type the name of your bucket, specify the preferred S3 storage class
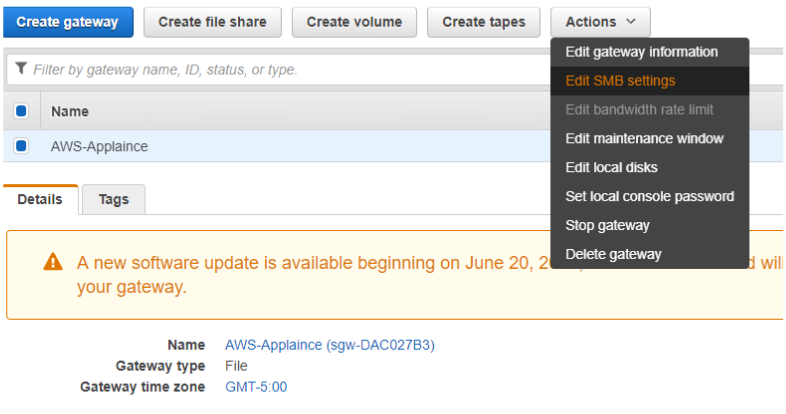
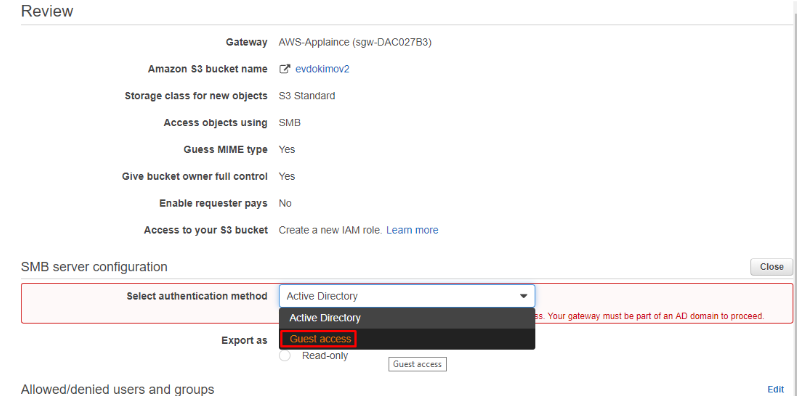
To activate guest access follow the pictures below:
- When you finish creating the file share, you will see the information regarding this file share.
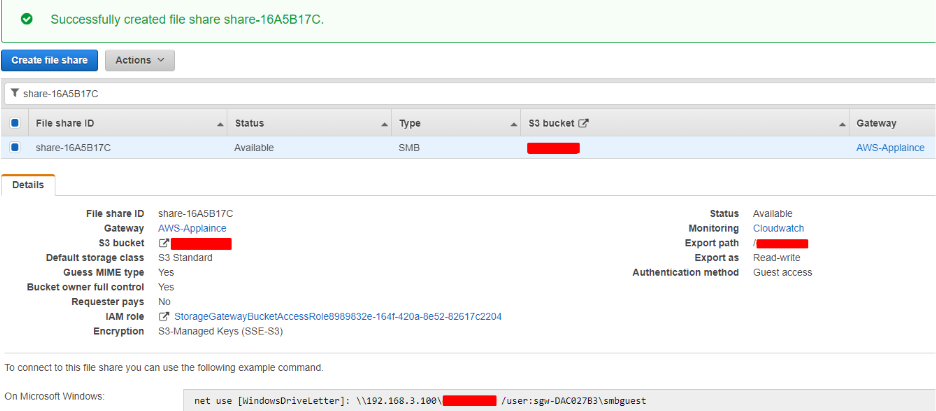
You will find the command below which need to be performed to map this drive in the windows' operation system.
Run Command Line tool. It doesn’t require administrator rights.
paste this command.
Replace [windowsDriveLetter] with your desired drive's letter.
In case of using guest access, type the password specified in paragraph 4.
After that, you can navigate to this drive using explorer. If you already have any data in this bucket, you will be able to see all this data. Please, be noted that this is only metadata listing your files. In case you try to access it, firstly it will be downloaded from the cloud and after that, it can be opened. Afterwards, the data will be available simultaneously locally and in the cloud. In case the VHD disk is full, infrequently used data will be automatically deleted from your local storage allowing downloading/uploading other files.
Configuring CloudBerry
You can set up CloudBerry to make backups to this mapped drive. All data will be uploaded to the cloud asynchronously. You will also have the possibility to download separate files only until you don’t configure compression and/or encryption by Cloudberry application.
1A) Configure a backup account for the mapped drive from the MBS portal
a) Open MBS portal
b) Navigate to Storage tab and select Storage Accounts.
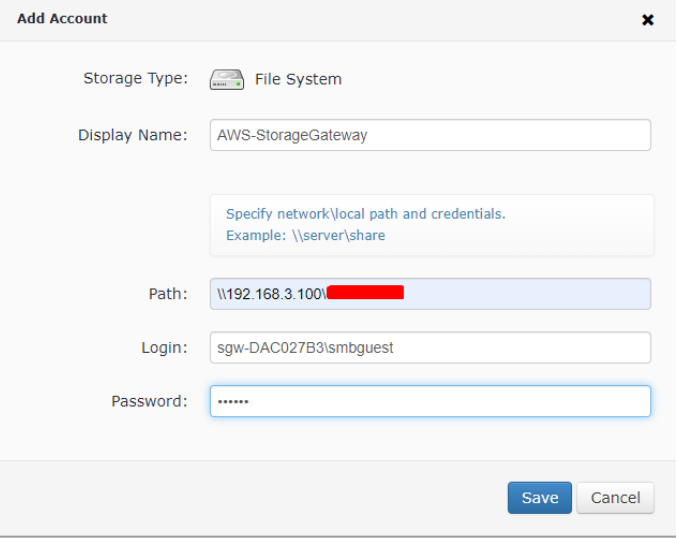
c) Press add Add Account.
d) Select File System.
e) Specify your VM’s IP address and bucket name. Use login from the command on the AWS file share page (paragraph 8 in Configuring AWS Gateway) and password from paragraph 4.
1B) Configure a backup account for the mapped drive from the Cloudberry backup agent
a)Find the Storage Account section in the Welcome tab.
b)Click on the plus sign.

c)Type the name and the path. Then Click on Change Network Credentials.
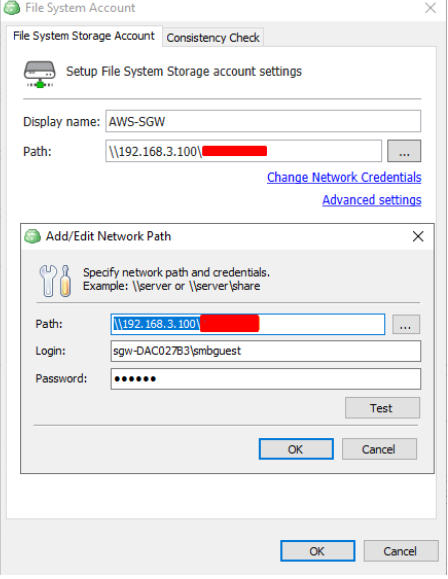
d) Click OK.
- Create the backup plan as usual with the usage of the created storage account.
Contact Us
- Tech questions: support@msp360.com
- Sales questions: sales@msp360.com