How To Create IAM Role With Permissions Required For MBS
IAM roles are entities in AWS that allow you to access and control services. Managed Backuo needs several permissions to be able to communicate with your Amazon S3 account. As you've already guessed, these permissions can be given via the IAM Role.
1. Preparations
If you’ve just started using Managed Backup Service - create a user and configure your storage account.
2. Adding the S3 storage in the MBS console
Log in to your MBS console, then under the Storage account section click the Add Account

In the pop-up window select Amazon S3 Cloud Storage and proceed with configuring your account.

Having specified the Storage account name in the Display Name field click the “question” button to open a help window on MBS role policies.
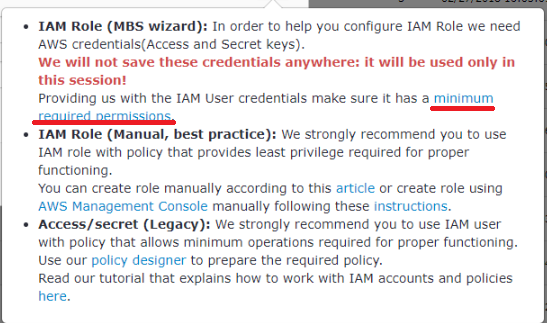
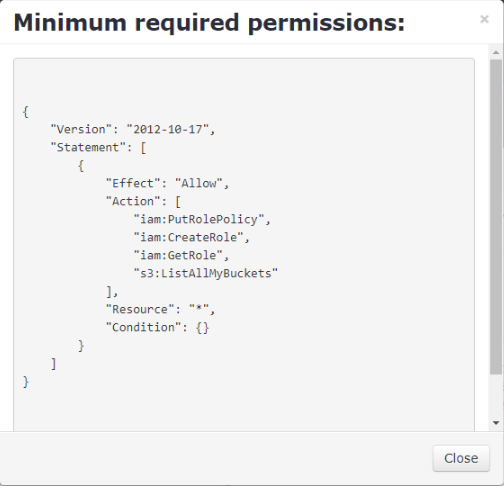
Click the link minimum required permissions to see the policy
Do not close this window, you will need it soon. We will come back to this later to finish the configuration. Open a new tab in the browser to continue with a user’s policy creation.
3. Creating and attaching the policy to an IAM user in the AWS console
Next step is to go to your AWS account and attach the policy to the user you are going to use for the backup. Log in to our AWS account and go to the IAM (Identity and Access Management) section.
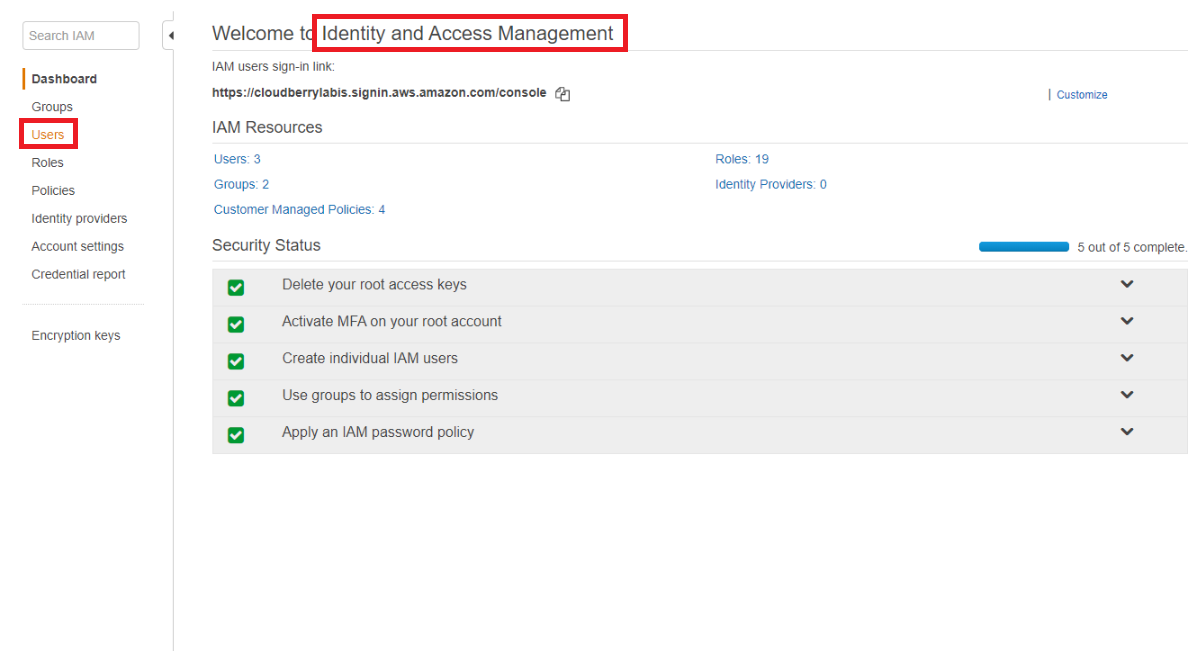
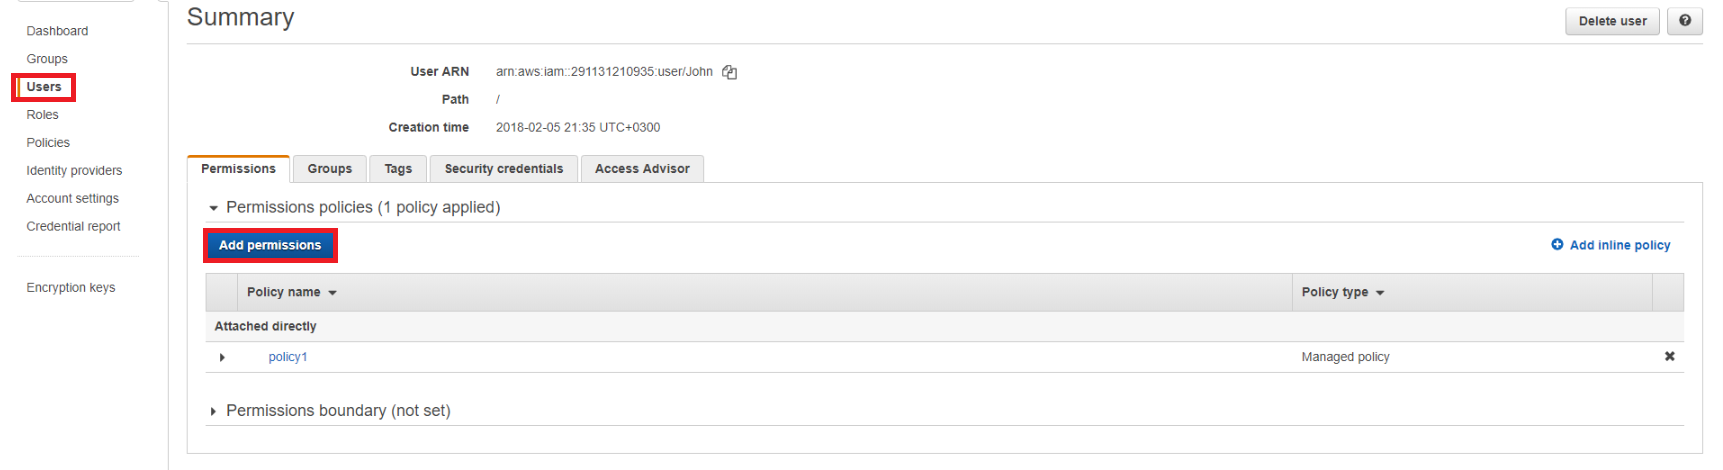
Choose the needed user.
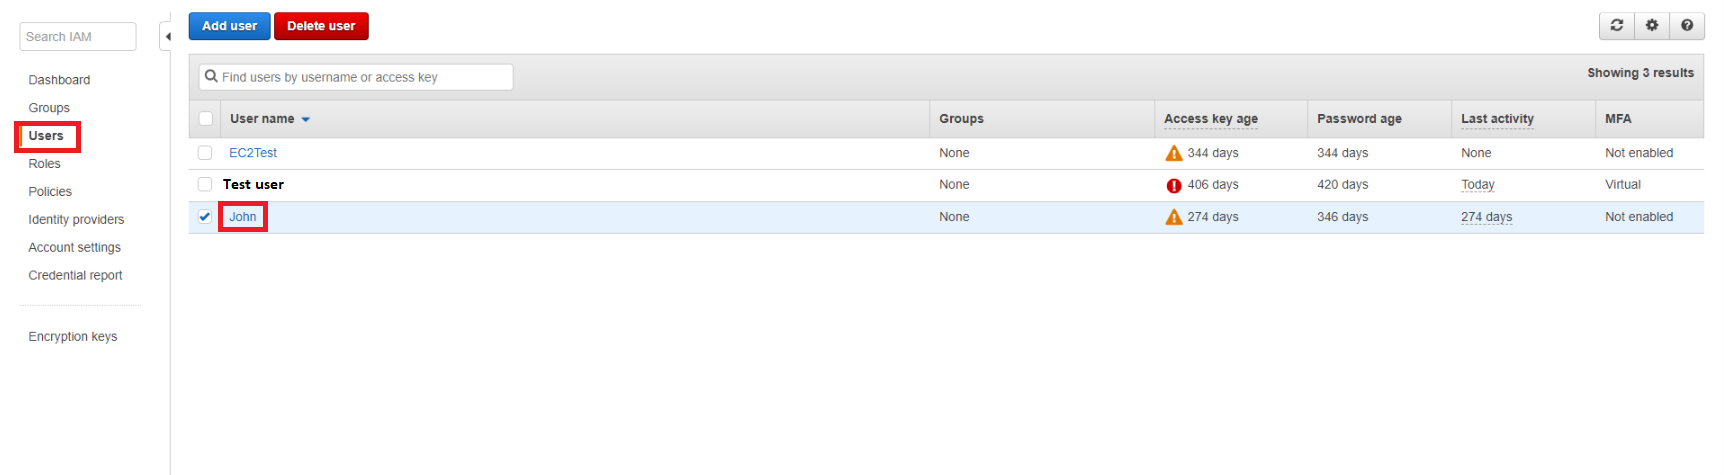
Click on the user to start editing the settings. The blue button Add permissions will open a window where you can create a new policy for that user.
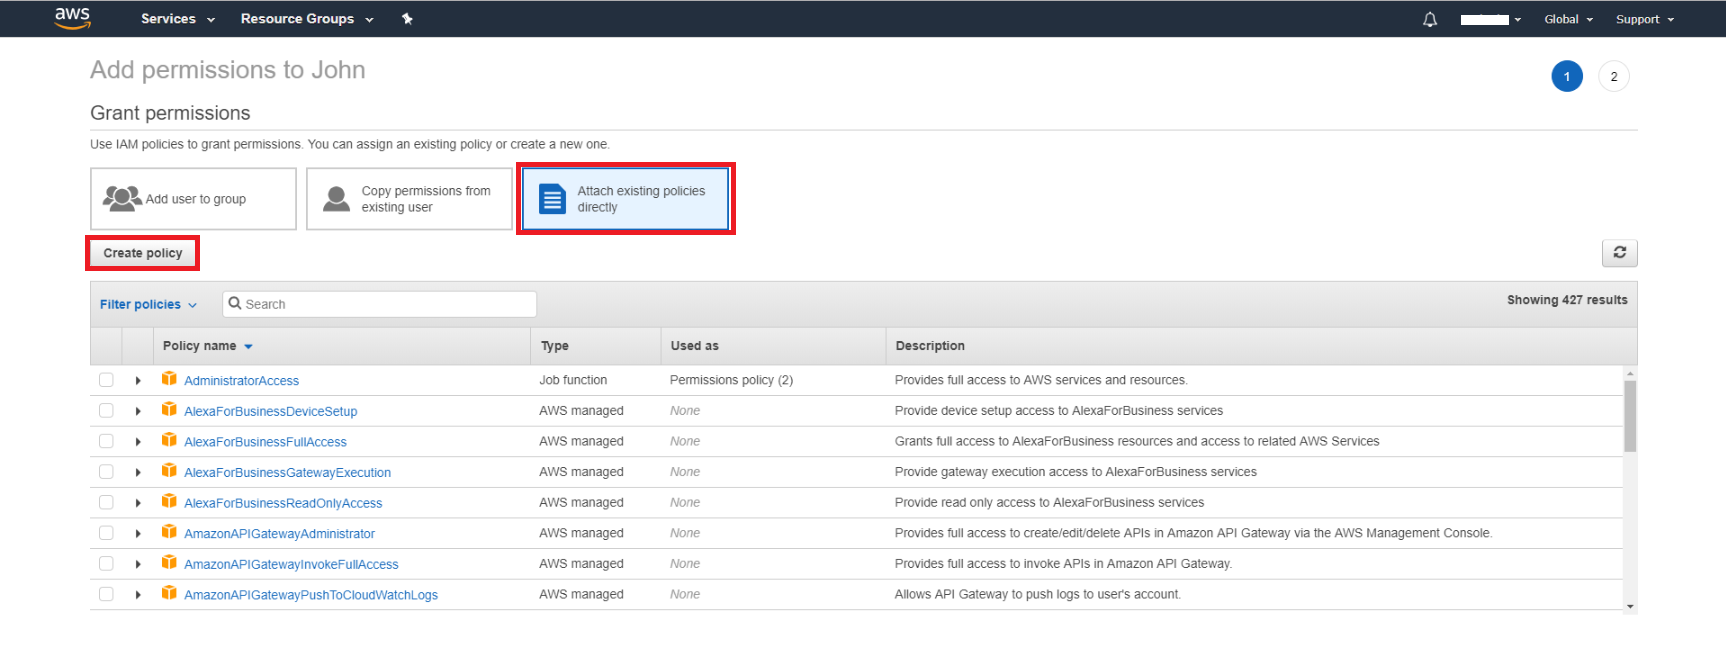
By selecting Attach existing policies directly you get a list of predefined policies. Click the “Create policy” button to create a new one which will be attached to this user for the Managed Backup Service.
In the Create policy window switch to a JSON format. You will see a default policy.
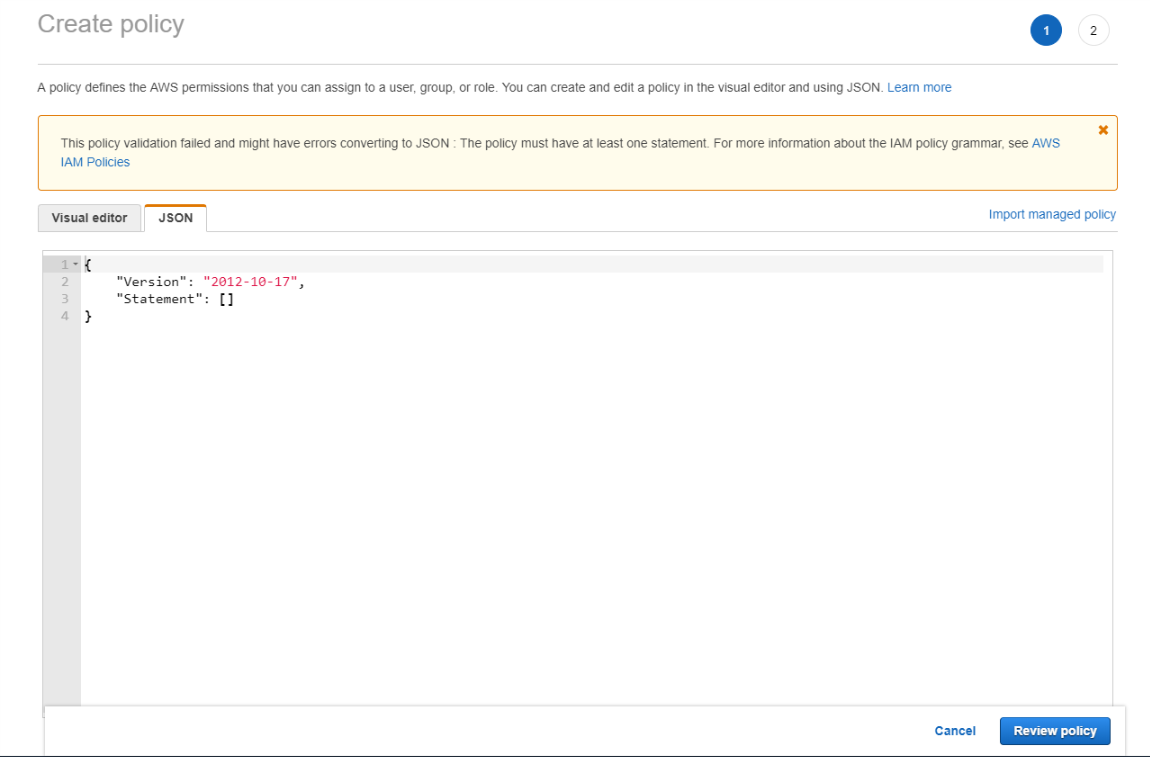
Now you need to go back to your MBS portal and copy the permissions from step 2 and replace the default ones in the AWS account.
{
    "Version": "2012-10-17",
    "Statement": [
        {
            "Effect": "Allow",
            "Action": [
                "iam:PutRolePolicy",
                "iam:CreateRole",
                "iam:GetRole",
                "s3:ListAllMyBuckets"
            ],
            "Resource": "*",
            "Condition": {}
        }
    ]
}
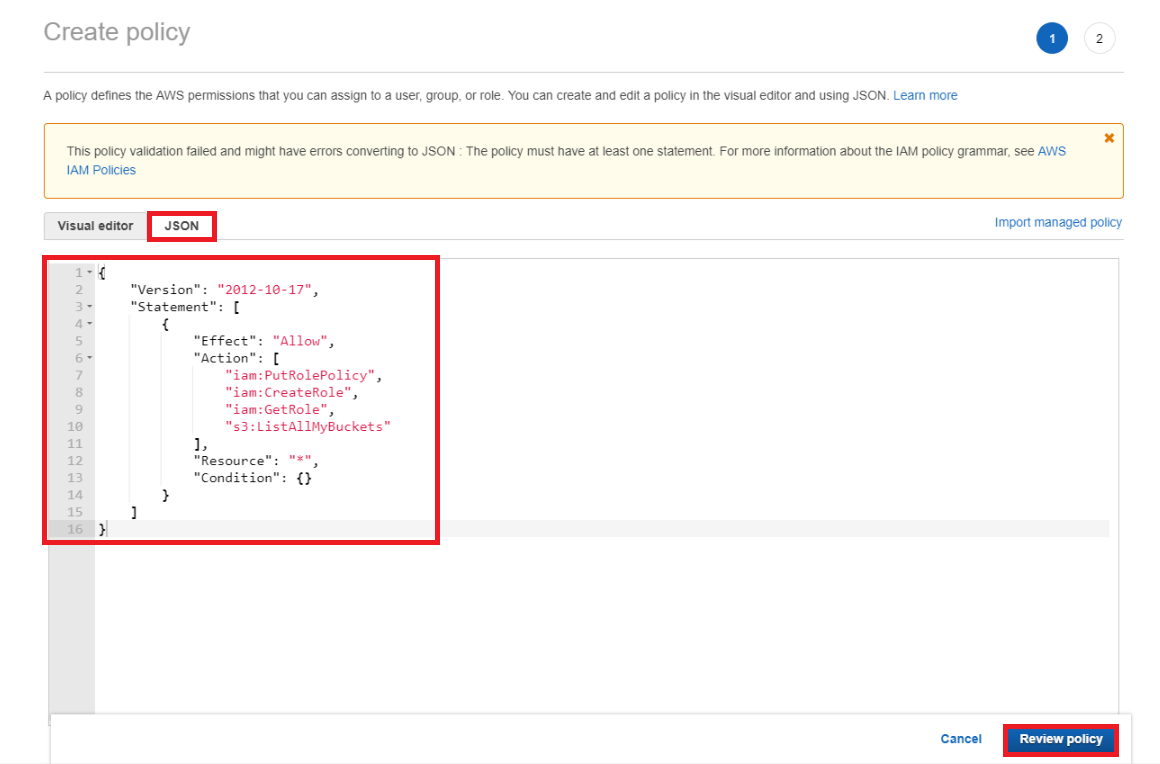
Now, click the Preview policy button.

Give a name to your Policy and proceed with Create policy button. Any comments in the Description field are optional. If everything was done precisely you will see a message that your policy has been created.
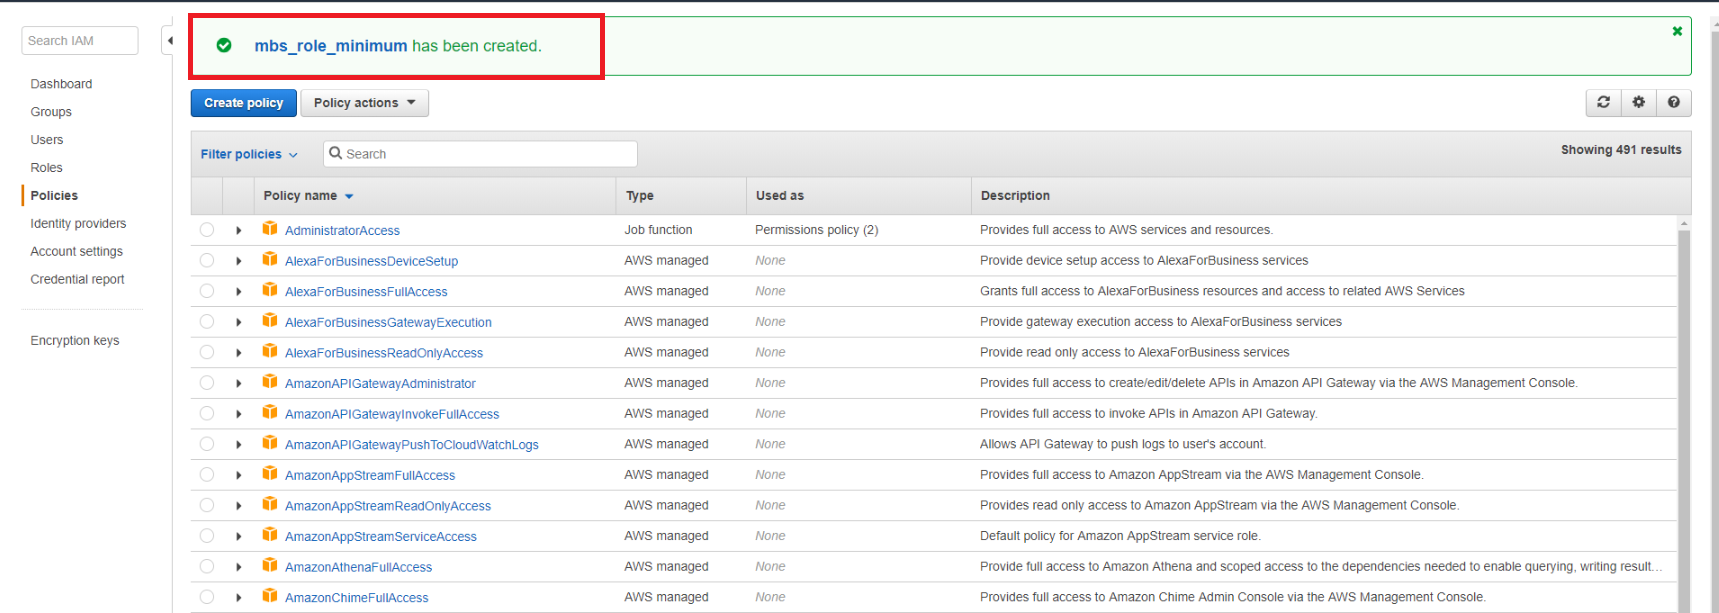
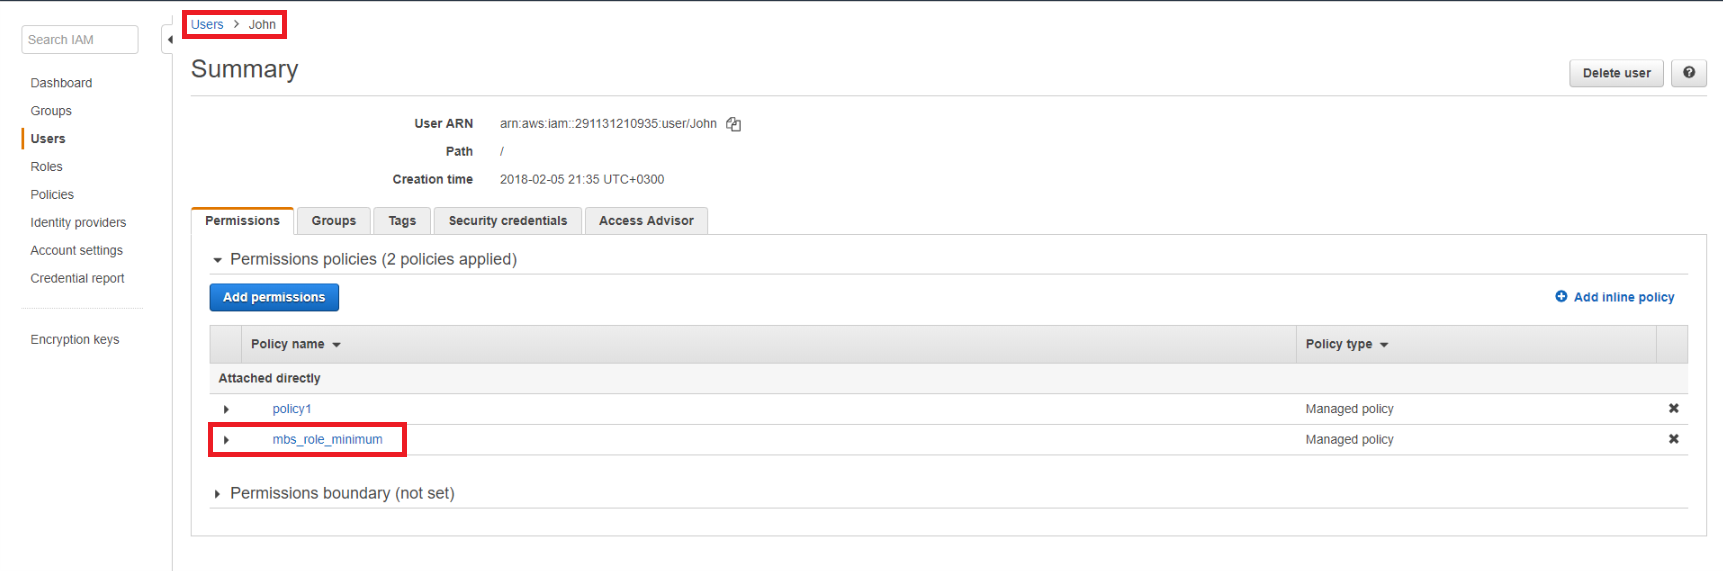
You can go back to a Users tab and attach this policy to your user. Some browsers could open a new tab to create a new policy in AWS account. Check if you have Users tab opened and close the one with the policy creation. Having done everything correctly you will have the following tab opened.
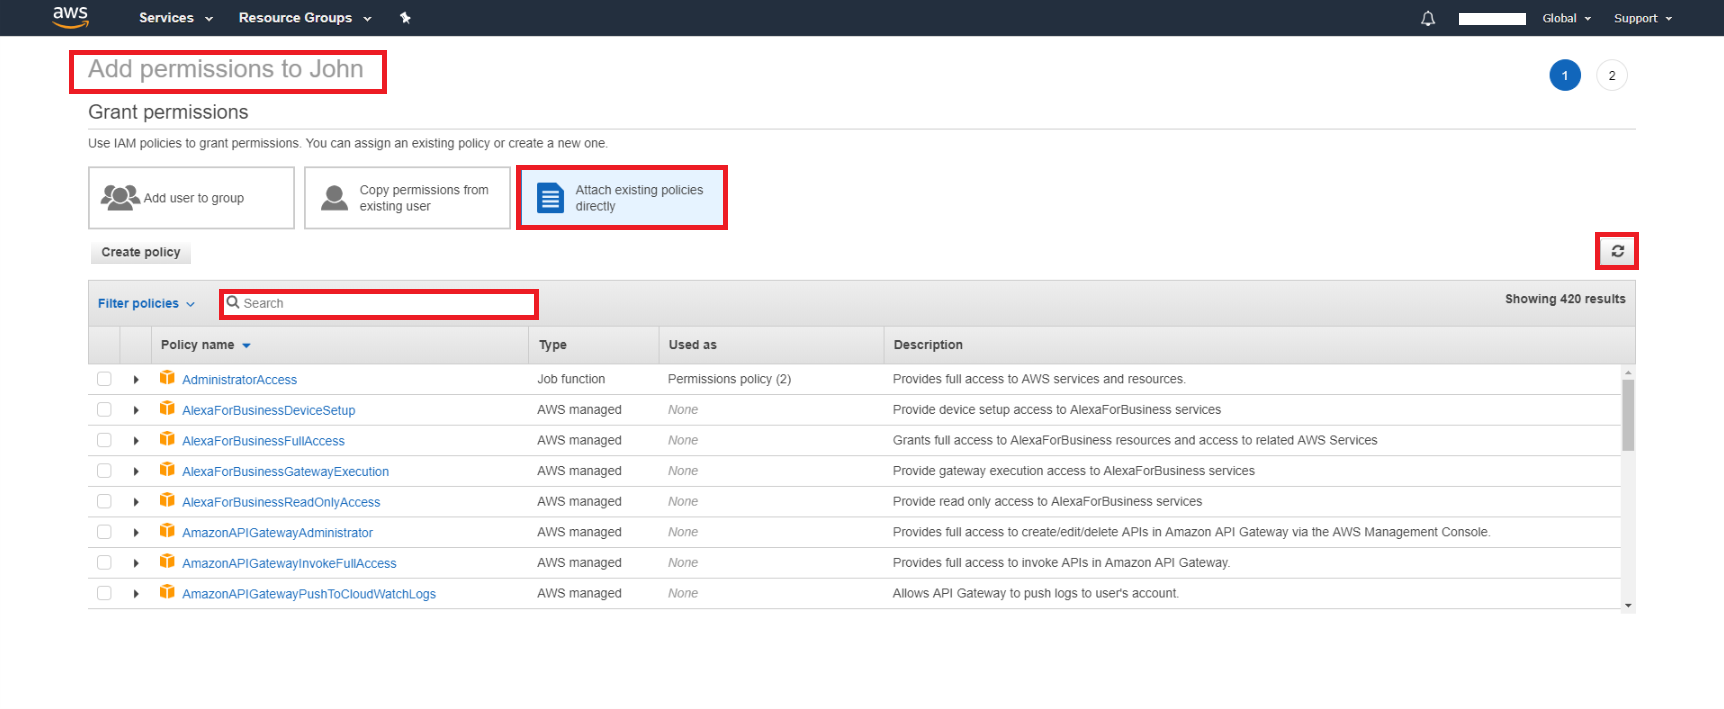
But this time all you need is to refresh the list of the policies and type in the search field your policy’s name.
Switch to the MBS portal where you have an opened pop-up window with Storage account settings and specify a proper Access Key and a Secret Key of the IAM User with the policy. You might need to click the “question” button again to make the help pop-up window disappear.
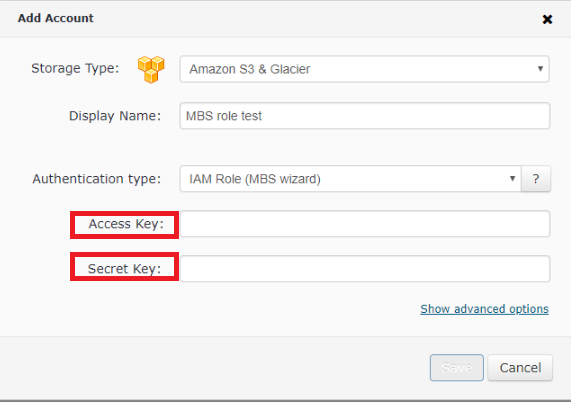
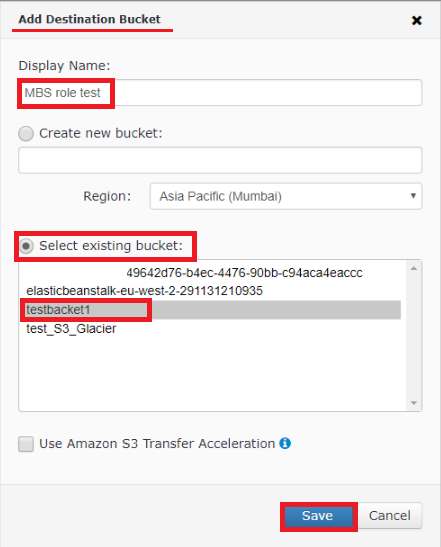
Once credentials are entered click Save button and proceed with selecting a Destination bucket for your backups. You can choose an existing bucket or create a new one.
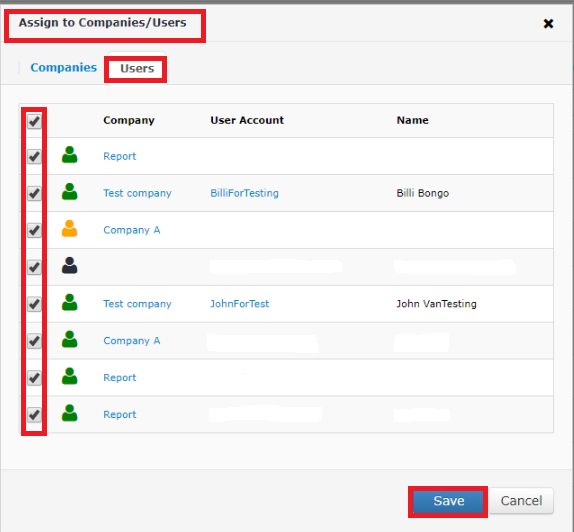
Having finished with specifying a Destination bucket you can add this Destination to all your existing MBS users or to just a few ones upon your choice.
Now you are ready to start your first backup job.
Feel free to contact us should you need any assistance.
Contact Us
- Tech questions: support@msp360.com
- Sales questions: sales@msp360.com