Importing Hyper-V Machines Restored As Files to a Hyper-V Host
Situation
MSP360 (CloudBerry) VM edition features backup and restore jobs for your virtual environment on Hyper-V hosts and ESXi Server hosts.
This article applies for Hyper-V server versions 2012 and later. Moreover, you can perform the same for Windows 8/10 Professional/Enterprise with the Hyper-V role enabled on it
Solution
- Open Backup for Windows.
- Switch to the Backup Storage tab.
- In the backup tree, select a Hyper-V restore point.
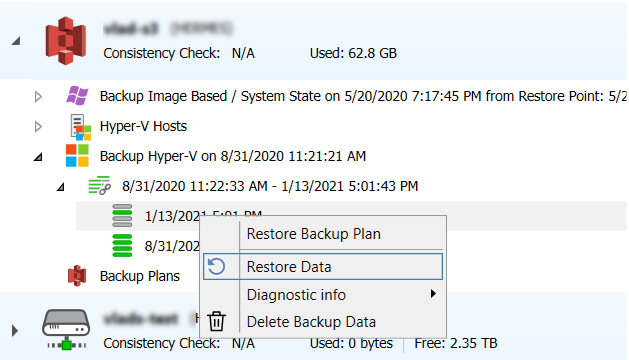
- Follow the Restore Wizard steps.
- On the Restore Type step, select Restore as Hyper-V machine.
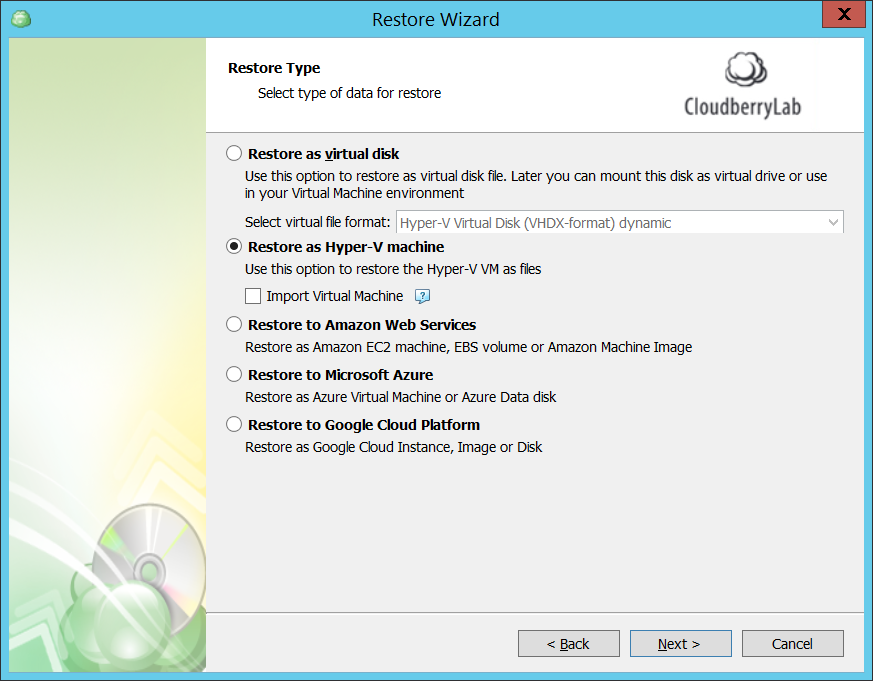
- Click Next.
- On the Destination step, specify path to restore. It can be custom, or, by default, the restore will be made to the original location.
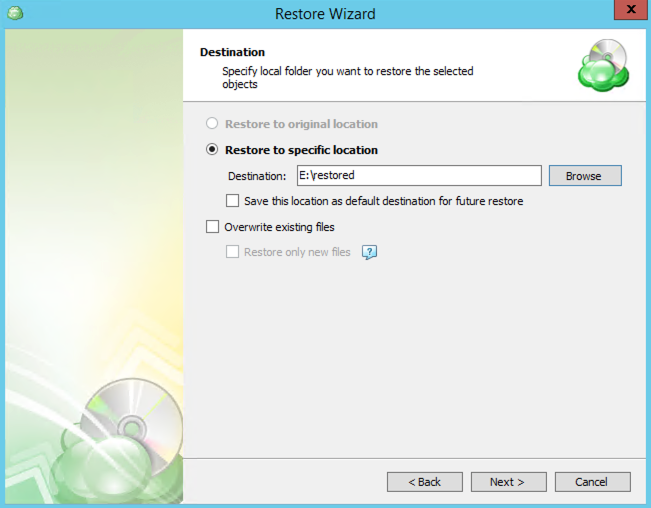
- Finish the Restore Wizard, then run the restore plan.
- Once the plan is completed, open the folder you specified on the Destination step.
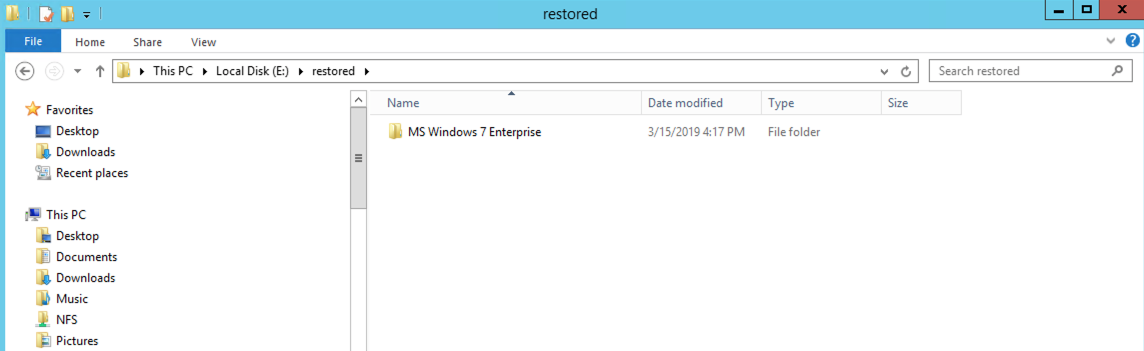
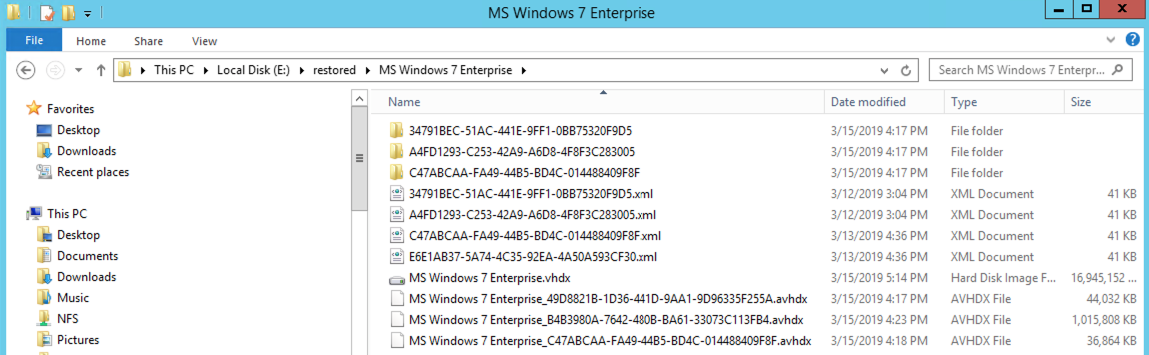
Typically, the restore folder contents look as shown below:
Before taking the next steps, make sure that the target Hyper-V server supports the configuration of the restored virtual machine.
For example, virtual machines with configuration versions 8.0, 8.1, and 9.0 created on Hyper-V Server 2016 and 2019 are not supported by Hyper-V Server 2012 and earlier due configuration format differences
Note: do not delete any files from this folder. These files will be needed for further steps
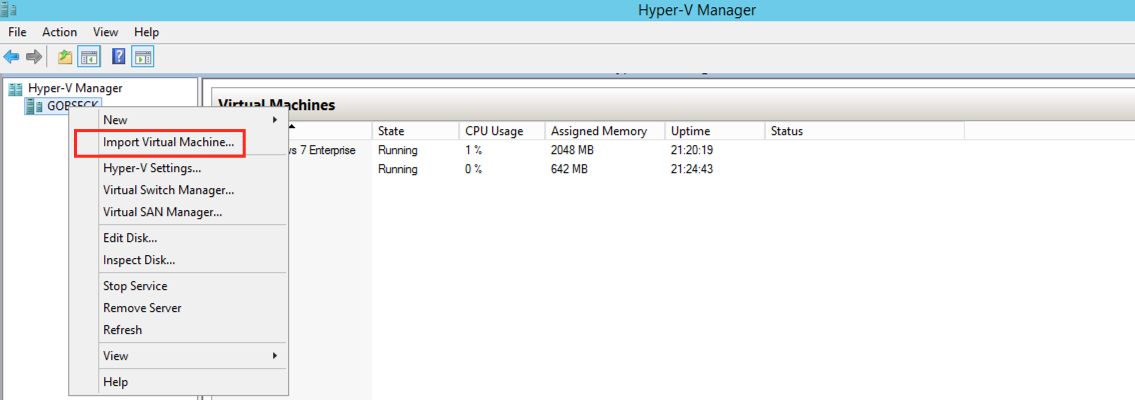
- Open Hyper-V manager.
- Select the required node for the restored VM to be imported.

- Right-click on the selected node, then select Import Virtual Machine....
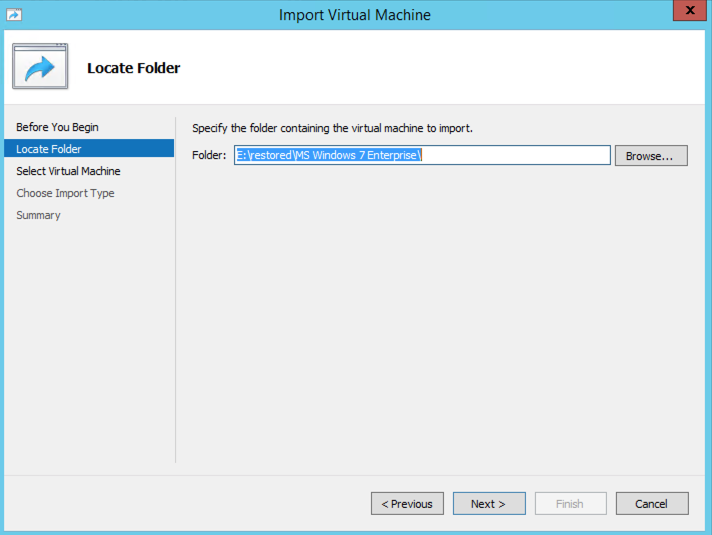
- Specify the folder with the VM to import.
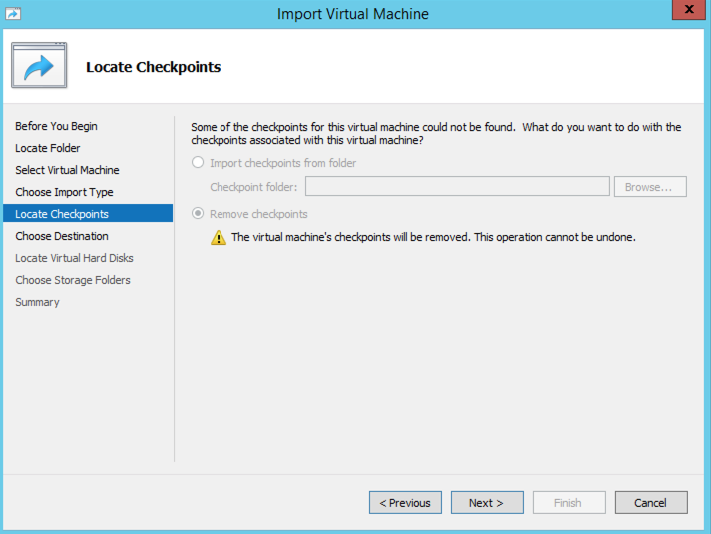
- Select the virtual machine to import. Different snapshots of the same guest machine may appear in the list (in case they exist). If you select a certain snapshot on this step, you will not be prompted to select a folder for them on further stages. Otherwise, you have to do it or select an option to remove snapshots.

- Click Next.
- Choose import type: register the VM, restore it, or copy.
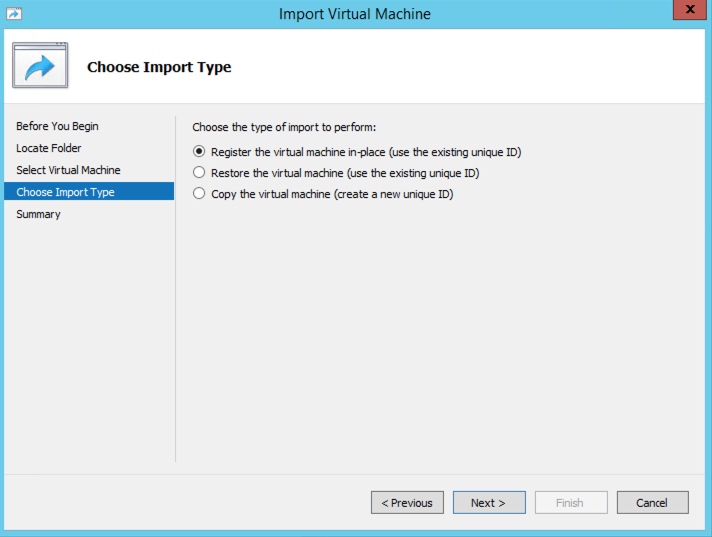
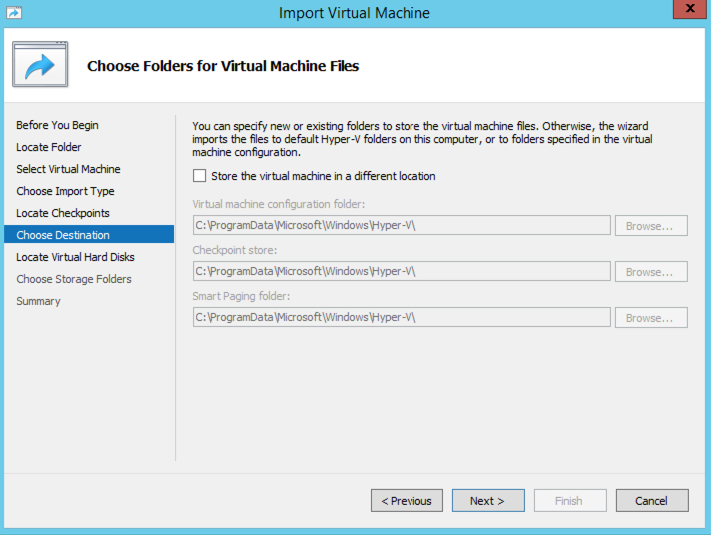
If you select an option Restore the virtual machine or Copy the virtual machine, specify the location to save virtual machine files.
By default, the configuration files and virtual disk files are stored in different locations. If you have default Hyper-V host settings, you can find the configuration in the following folder: C:\ProgramData\Microsoft\Windows\Hyper-V, where the Virtual Machines subfolder contains the configuration, and Snapshots subfolder contains the snapshot configurations (.avhdx files are stored with virtual disks).
If there the folder you selected in the wizard contains no subfolders, they will be created automatically
In some cases, Hyper-V software requires to specify the location of the virtual machine snapshots. If the snapshot configuration files are missing, you can remove it. Otherwise, you can enter the folder path where snapshots are stored:
To place restored files to default location, folders must be selected in the following way:
- Click Next.
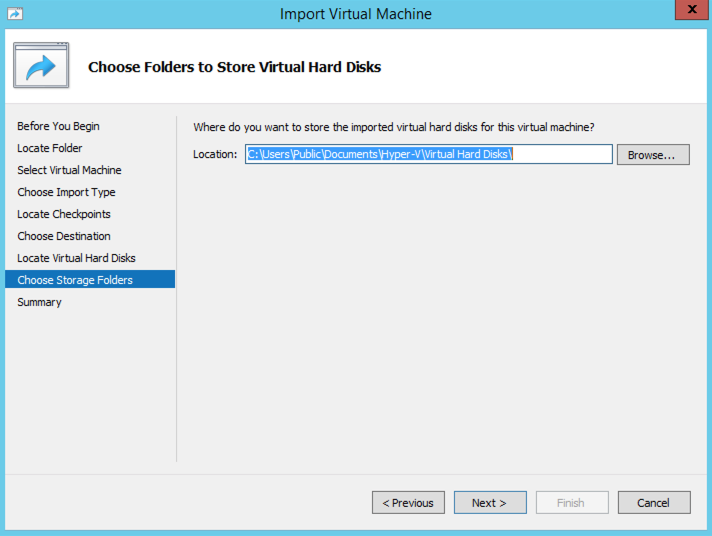
- Specify virtual disks to import. Select the folder with restored disks:
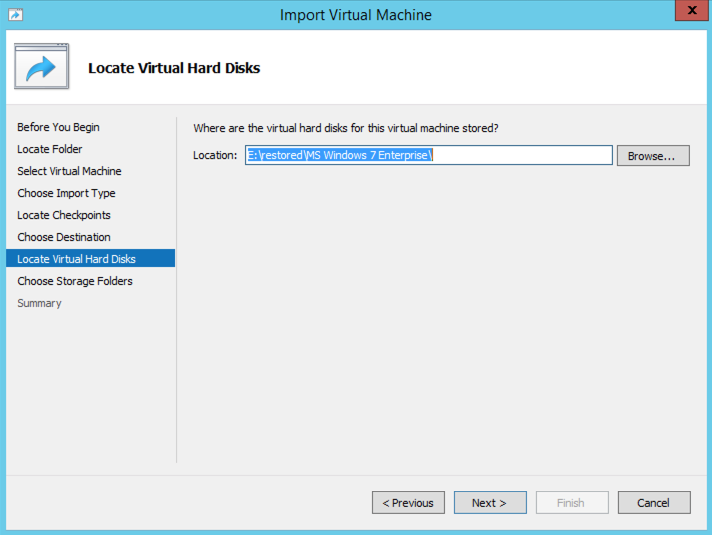
- The default disk files location is "C:\Users\Public\Documents\Hyper-V\Virtual hard disks".
Note that disks and .avhdx snapshot files will be placed to the folder you select
- Once you complete the wizard, review all specified settings in summary.
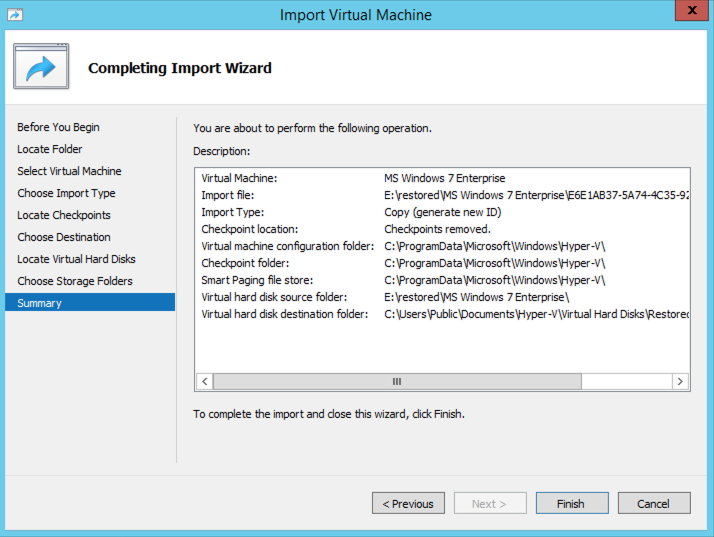
- Click Finish. The import starts.