Enable an Untrusted Application in Google and Office365 SMTP
Google may block sign-in attempts from some applications or devices that do not use modern security standards. Since these applications and devices are easier to break into, blocking them helps keep your account safe.
In some cases you may need to enable untrusted applications in common online mail services such as Gmail or Office365 mail. This article covers the subject how to configure your SMTP settings.
This article covers the following topics:
Configure Gmail Account
Note that you need a Gmail account or paid Google Apps Account to integrate SMTP. If you do not have an account and select Google Mail as your email gateway provider, create an account before proceeding with the step-by-step guide below
- Log in to required Google account with your login credentials.
- Enable the 2-step verification by Google. If you the 2-step verification is enabled, go to the next step.
- Generate an App Password which will be used for the SMTP integration. To learn how to do it, refer to the Sign in Using App Passwords article at support.google.com.
- Select the required appplication from the drop-down menu. Select Other (Custom name).
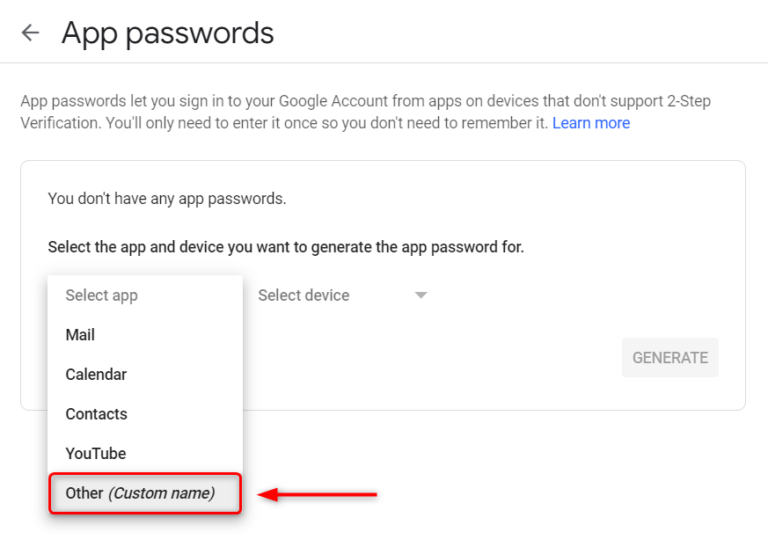
- Specify the name to the new App password, then Generate.
- Once the app password is generated, save it to some safe place, then click Done.
- Provide the generated app password in the software required to be listed as trusted.
Configuring an Office365 Account
- Log in to Office 365 at https://portal.microsoftonline.com using the Global Admin credentials.
- Once logged in, click Admin at the top right, then click Exchange to go to Exchange Admin Center.
- Click on mail flow, then switch to the Connectors tab.
- Under Inbound Connectors, click +.
- Specify the name of the inbound connector. For example, From yourdomain.com.
- Under the connector type, select Partner.
- Under Connection Security, select Force TLS and type * under Certificate. This symbol means TLS is forced for all certificates which matches *.
- Under Domain restrictions, select None.
- Under Domains, click +, then add your domain.
Do not enter anything under IP addresses and Accepted domains
- Click Save. This connector will now force TLS for any incoming SMTP connections coming from yourdomain.com.
- Go back to the Exchange Admin Center, under Outbound Connectors, click + to create a new outbound connector.
- Under Name, specify the connector name. For example, To yourdomain.com.
- Under the connector type, select Partner.
- Under the connection security, select Trusted certification authority.
Note that this will be different according to the partner domains you are adding. You can also select Opportunistic TLS or self-signed certificate according to your security requirements
- Under Outbound delivery, select MX record associated with the recipient domain.
- Under Domains, click +, then add yourdomain.com.
- Click Save.
This will ensure that all emails coming out from Office 365 to yourdomain.com will always be forced a TLS connection.